Here we will set up the Thunderbird email client (version 3) to send and receive our KKoncepts email account. (Click here if you need instructions for setting up Thunderbird version 2.) We'll use an imaginary user named "K. Koncepts" who has the email address. "k.koncepts@kkoncepts.net". Anywhere you see those names, you should, of course, use your own name and email address.
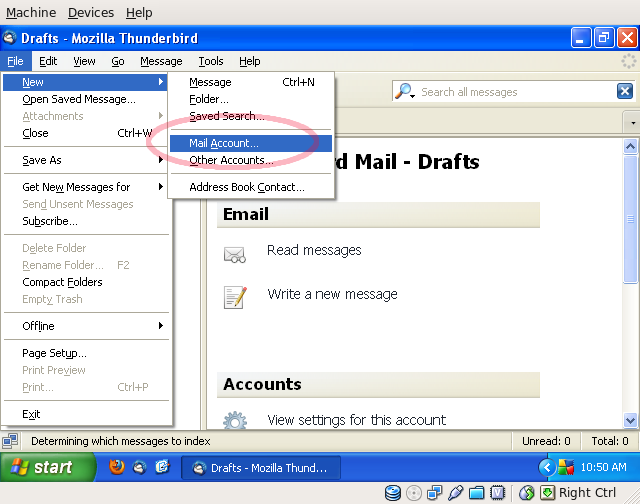
To set up your account, open Thunderbird and click on the "File" menu. Then select "New" and finally "Mail Account..."
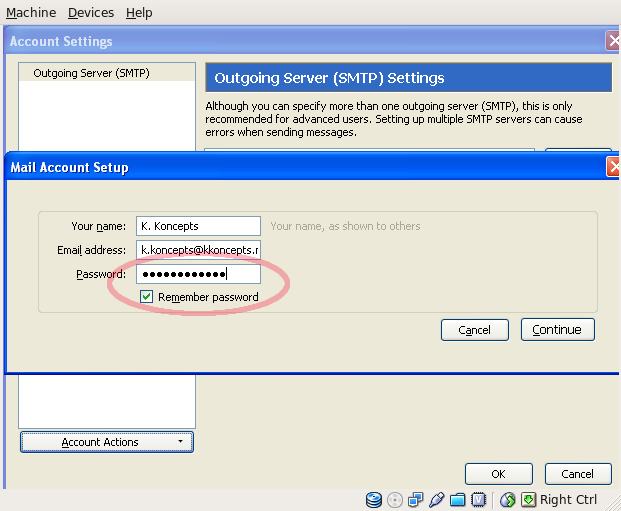
Here's a screen shot of what that will look like. (Throughout this document, we'll highlight in light-red ovals where on the screen you should click or enter information.)
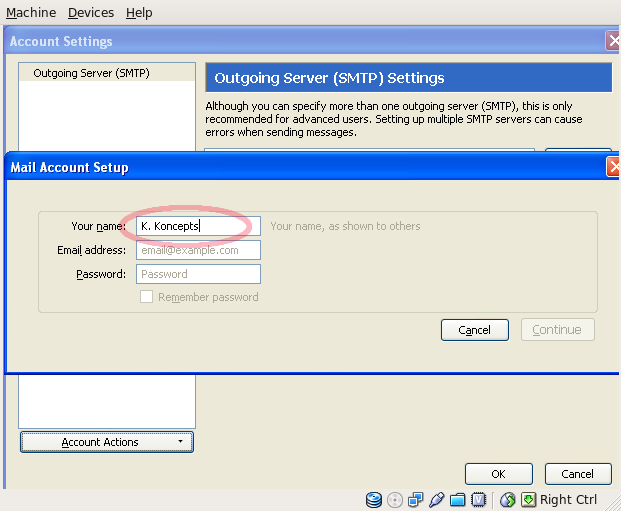
This will open the "Mail Accounts Setting" box. Here will enter all the information necessary to create our account.
First, enter the name that you want others to see as the "From" address where it says "Your name". (This is not your email address; this is your name.) In our case our user is named "K. Koncepts" so that's what we'll enter.
Enter your KKoncepts email address where it says "Email address". That's "k.koncepts@kkoncepts.net" in our example.
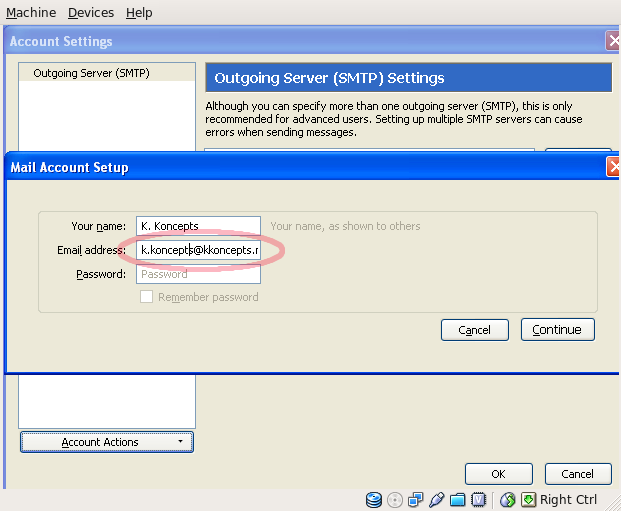
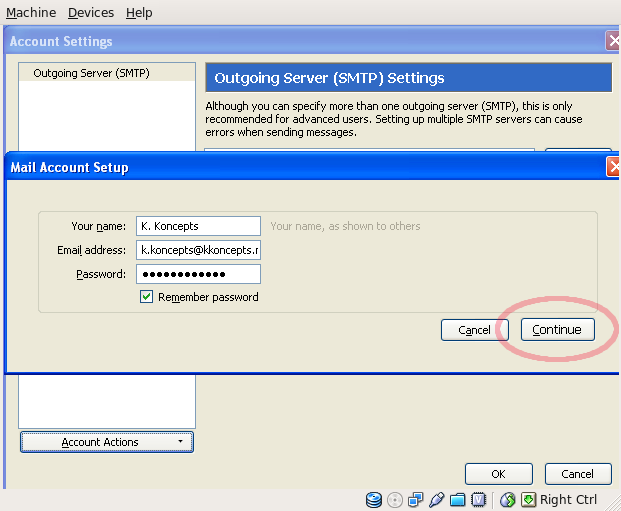
Finally, enter your password where it says "Password". If you don't want Thunderbird to prompt you for your password every time you start it, make sure the box labeled "Remember password" is checked.
Once you've enter those three field, click the "Continue" button.
Automatic Set-up
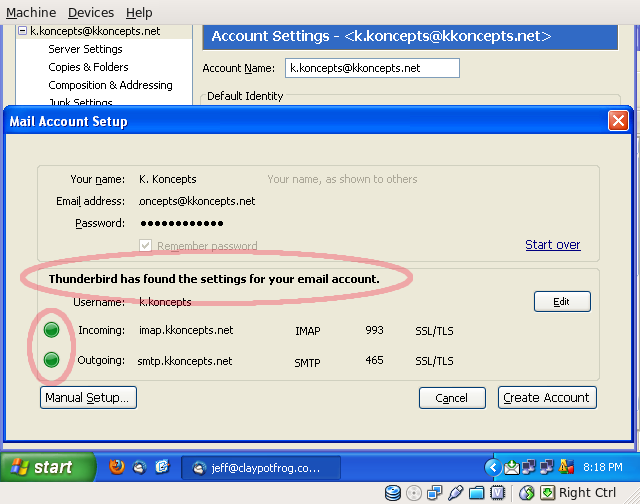
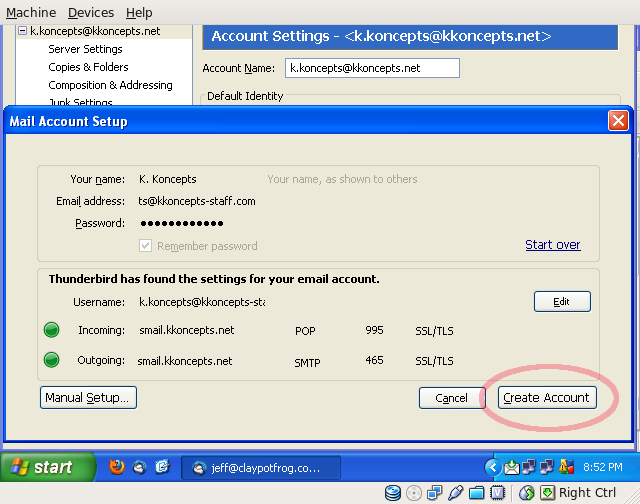
Thunderbird will now try to automatically set up your KKoncepts account. If it can, then after a few minutes of activity, you'll see green lights next to the Incoming and Outgoing server lines and a notice above them saying that Thunderbird has found all your settings.
If your email address is NOT "@kkoncepts.net", then Thunderbird probably won't set it up correctly. In that case click here to skip this section and go to the section on manually entering the necessary settings.
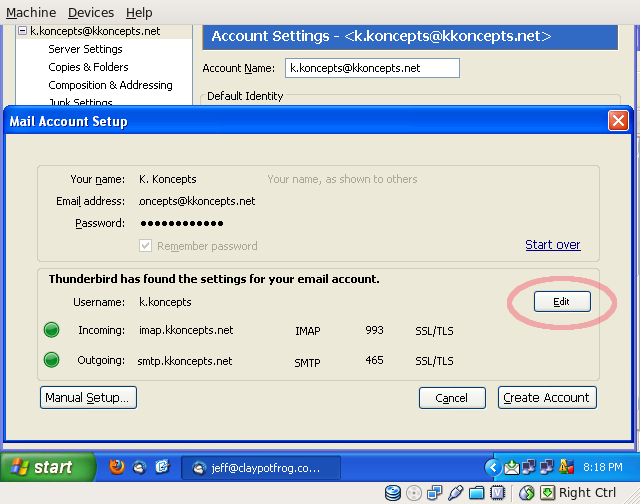
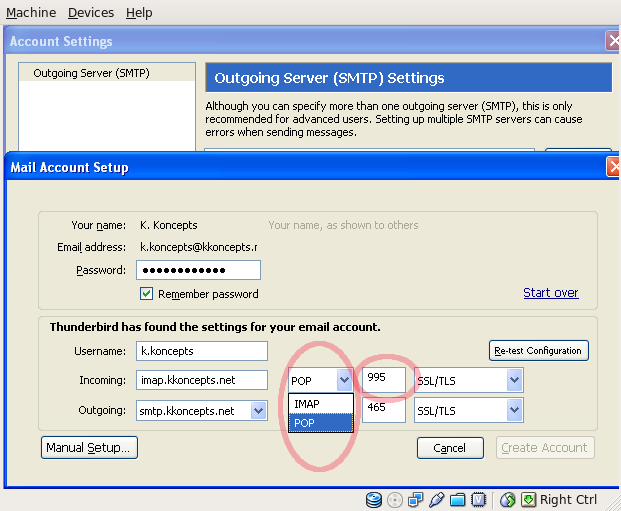
By default, Thunderbird will try to setup an IMAP account. If that's what you want, then click here to skip the next section and go right to account creation. But if you'd rather have a POP3 account, then you need to click on the "Edit" button and change the settings. (If you are not sure, you probably want a POP3 account, so follow this step.)
Click on the drop-down box that says "IMAP" and change it to say "POP". Then change the port number to the right of it to say "995".
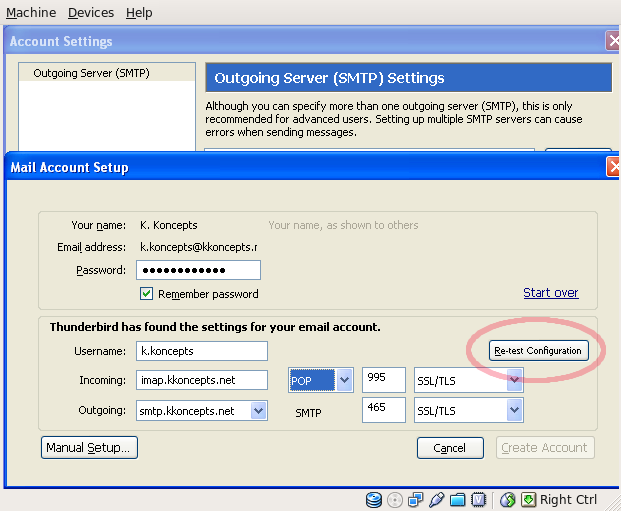
Now click the "Re-test Configuration" button and allow Thunderbird to check your POP3 account settings.
Once the account settings are correct, click the "Create Account" button to create the account in Thunderbird.
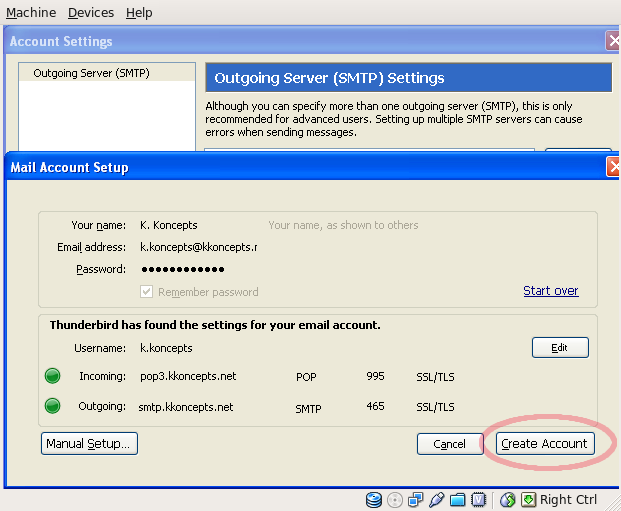
This will take you back to the main Thunderbird window. (Assuming all went well, click here to skip the next section on manual setup. If Thurderbird was unable to find your settings, however, then follow the instructions in the "Manual Setup" section which comes next.)
Manual Setup
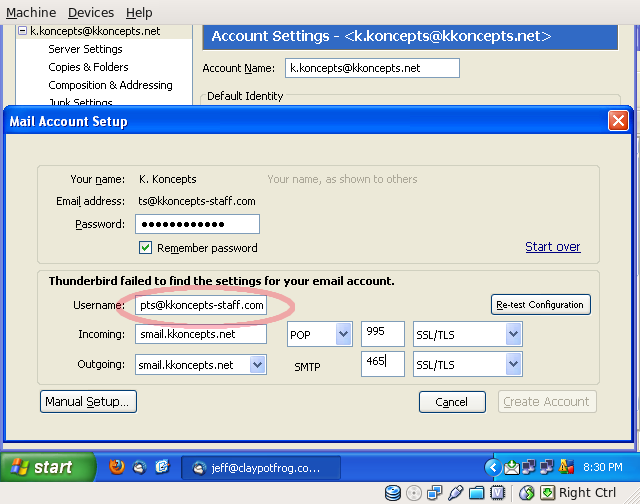
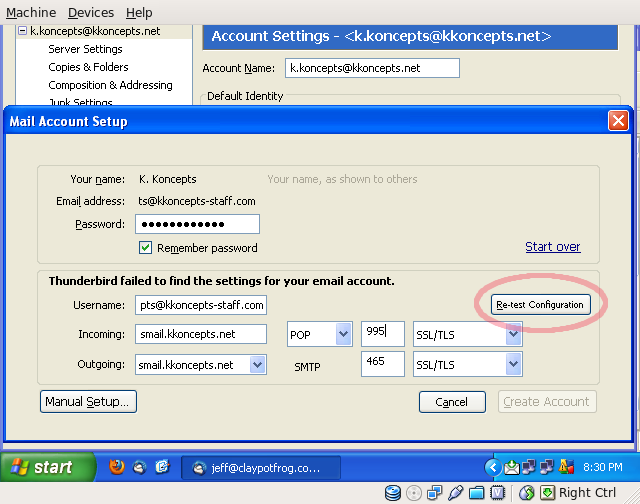
If Thunderbird cannot find your settings, then it will tell you that it failed to automatically discover your settings, and it will allow you to manually enter in the required settings.
In the following few screens, we are setting up the email account "k.koncepts@kkoncepts-staff.com". Thunderbird is unable to automatically discover our settings so it is waiting for us to manually enter them.
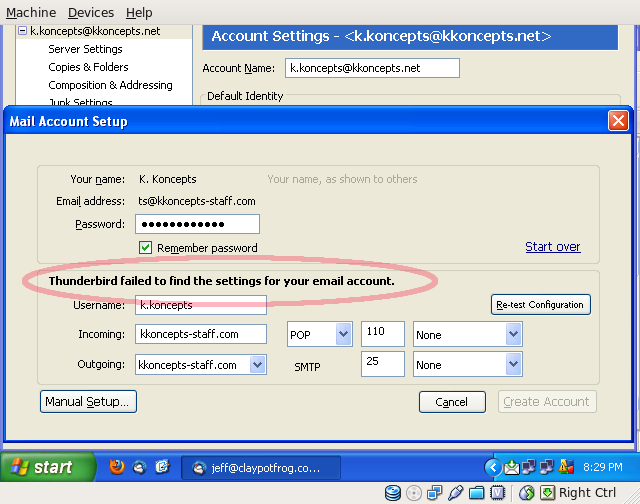
First enter in your FULL email address into the field labeled "Username". In this example, our email address is "k.koncepts@kkoncepts-staff.com", so that's what we enter.
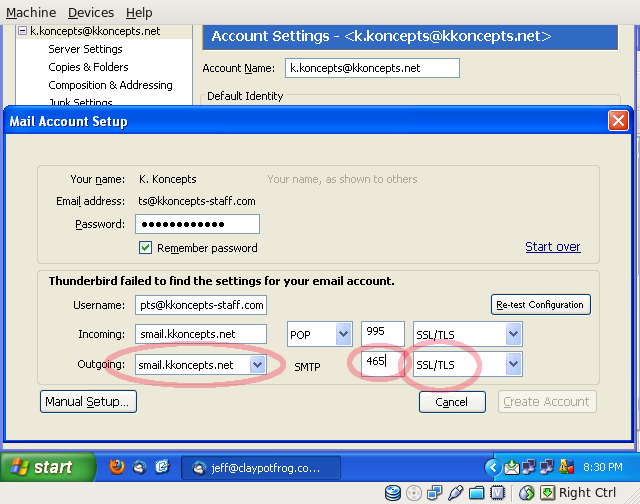
Next, in the "Outgoing" line, enter ">smail.kkoncepts.net" in the first field, then put "465" in the second field, and choose "SSL/TLS" from the drop-down list in the third field.
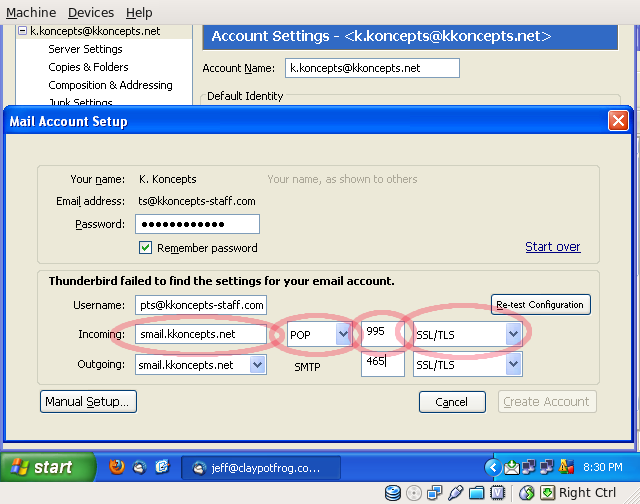
If you wish to create a POP3 account, then enter "smail.kkoncepts.net" into the first field, select "POP" from the drop-down list in the second field, enter "995" in the first third field, and select "SSL/TLS" from the drop-down box in the last field.
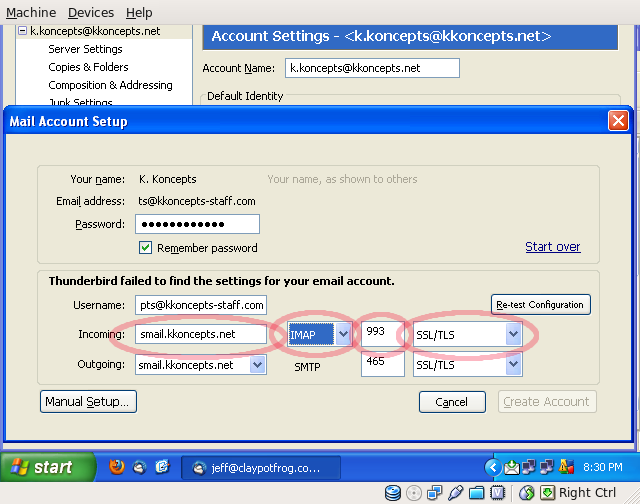
If you wish to create an IMAP account, then enter ">smail.kkoncepts.net" into the first field, select "IMAP" from the drop-down list in the second field, enter "993" in the first third field, and select "SSL/TLS" from the drop-down box in the last field.
Then click the "Re-test Configuration" button to allow Thunderbird to check your settings.
If you've entered everything correctly, Thunderbird will tell you that it's verified all your settings and you can click on the "Create Account" button to create the account. (If Thunderbird can't verify your settings, you probably made a typo. Go back and check what you entered against the text and images above. If you still can't connect, you may have a problem with your internet connection.)
Final Settings
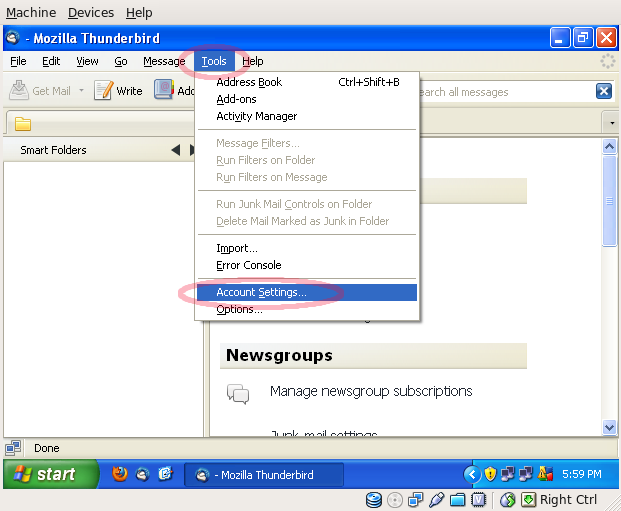
Your KKoncepts email account is now set up and ready to use, but you may wish to check and/or change some of the defaults which Thunderbird has choosen. To edit your account, click on the "Tools" menu and then choose "Accounts Settings". (If you are using Linux, then the "Account Settings" item is found in the "Edit" menu, not the "Tools" menu.)
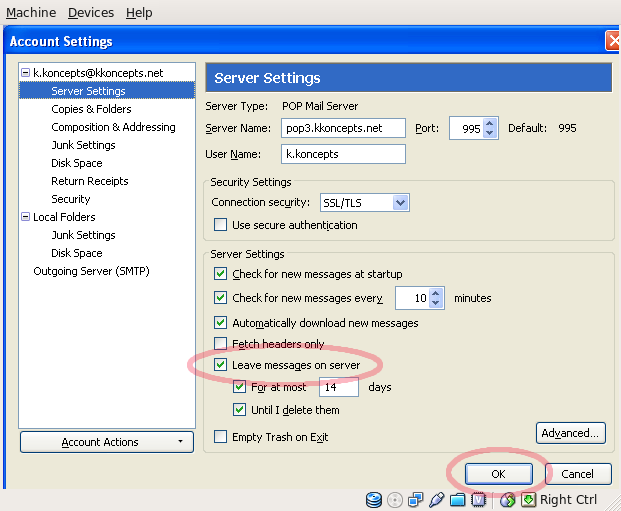
This will bring up the accounts box where you'll see your KKoncepts email account now. In the left-hand panel, click on the line labeled "Server settings" under your account.
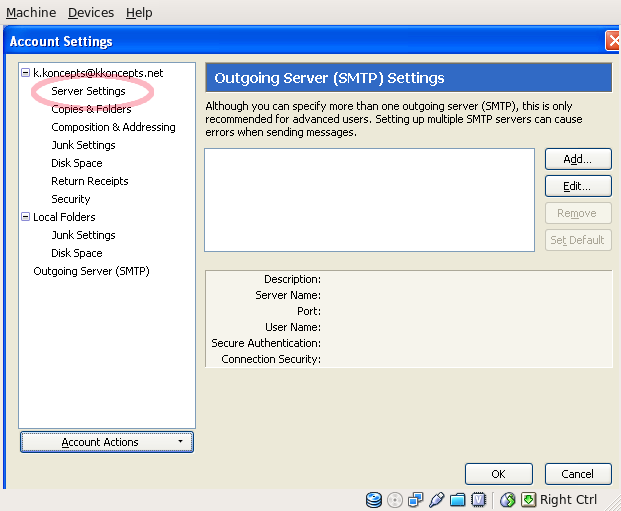
If you have set up a POP3 account, then by default Thunderbird will leave a copy of all your messages on the server for 2 weeks. If you want to change that and delete the messages from the server as soon as you have downloaded them to your computer, then UN-check this item. Click "OK" once you are done to close this window.
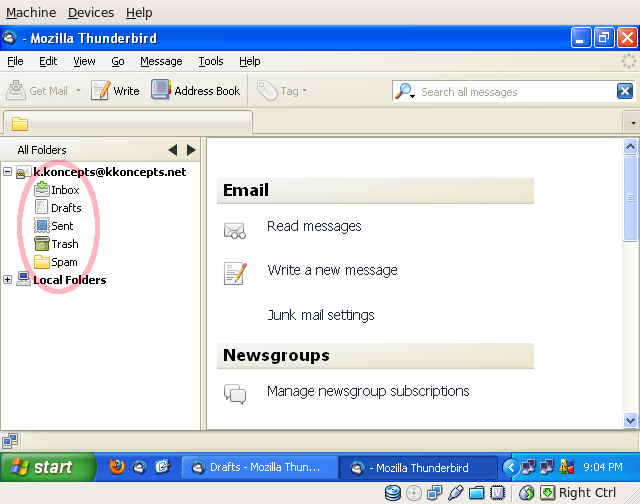
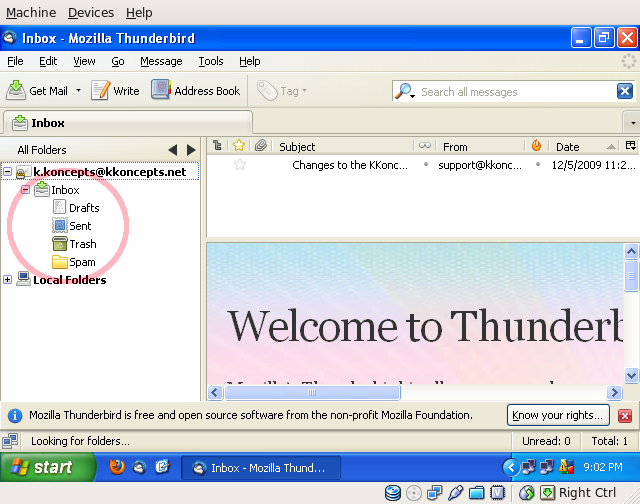
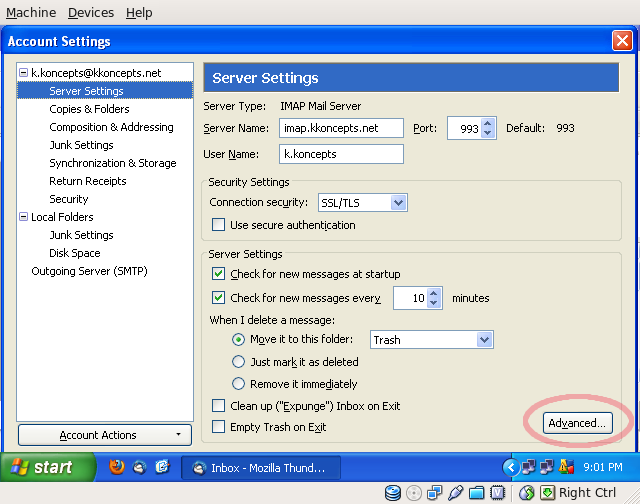
If you have set up an IMAP account, then by default, all your folders are going to show up as "children" of your INBOX. So your folder display will look like the following.
There's nothing wrong with displaying your folders like this, but if you prefer that they all appear on the save level with each other, then in the Server settings box, click on the "Advanced" button...
Then in the "Advanced Account Settings" window, enter "INBOX" in the field labeled "IMAP server directory".
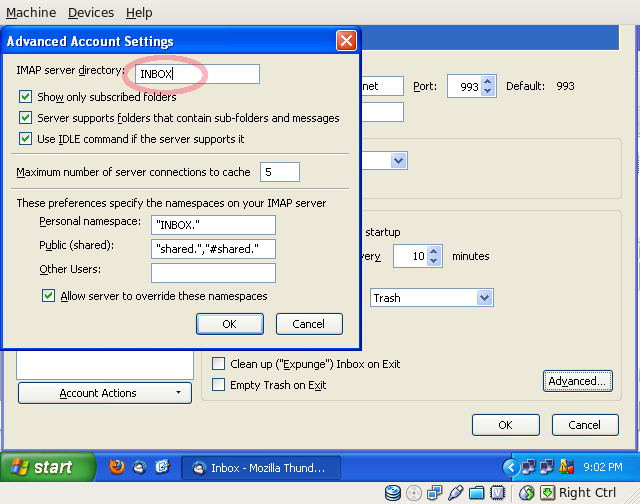
Click "OK" to close this window and "OK" again to close the "Account Settings" window. Then restart Thunderbird to make it re-read your IMAP folders and you'll see them lined up all on the same level.