Here we will set up Outlook XP to send and receive our KKoncepts email account. We'll use an imaginary user named "K. Koncepts" who has the email address. "k.koncepts@kkoncepts.net". Anywhere you see those name, you should, of course, use your own name and email address.
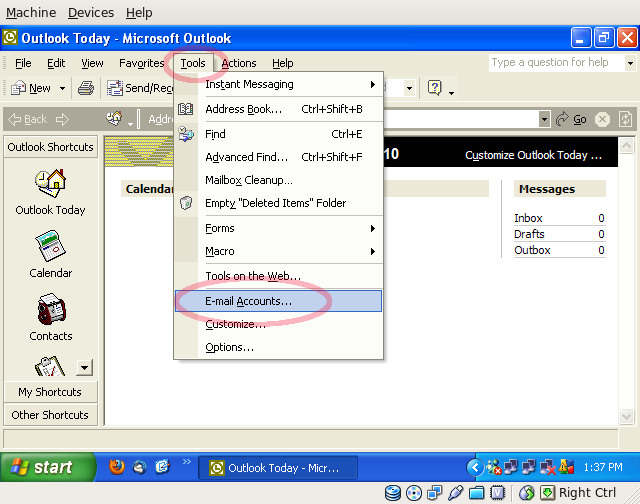
To set up your account, open Outlook, click on the "Tools" menu, and then select the "E-mail Accounts..." item. (Throughout this document, we'll highlight in light-red ovals where on the screen you should click or enter information.)
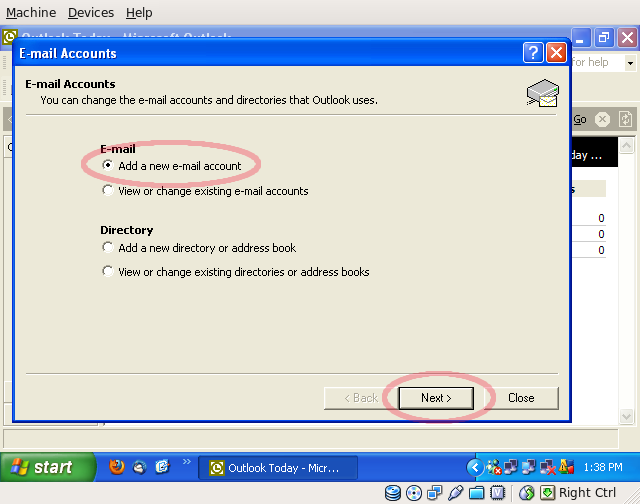
Then in the window that appears, select the radio option "Add a new e-mail account" and click the "Next" button.
If you want to create a POP3 account, then choose the "POP3" option and press the "Next" button.
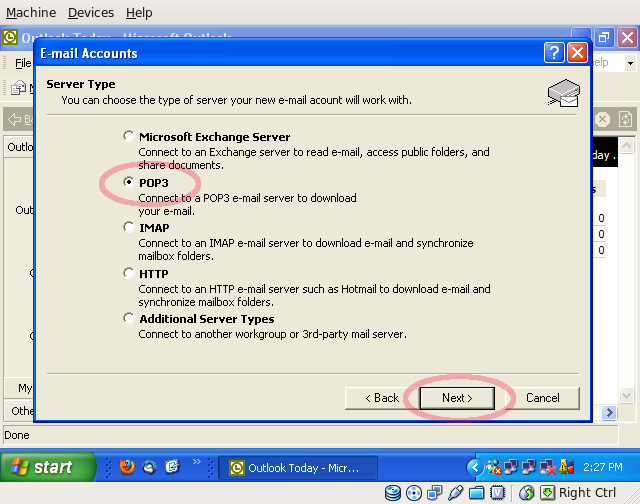
If you want to create an IMAP account, then choose the "IMAP" option and press the "Next" button.
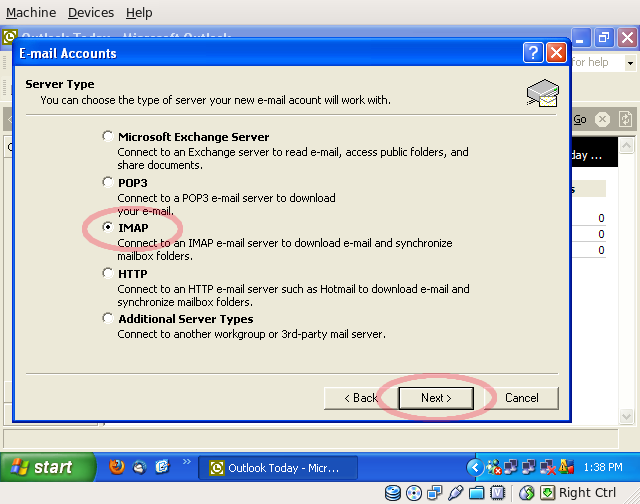
(If you aren't sure, select the "POP3" option.)
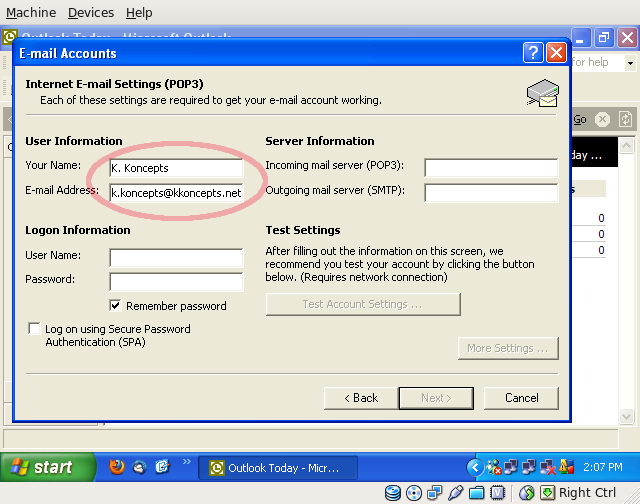
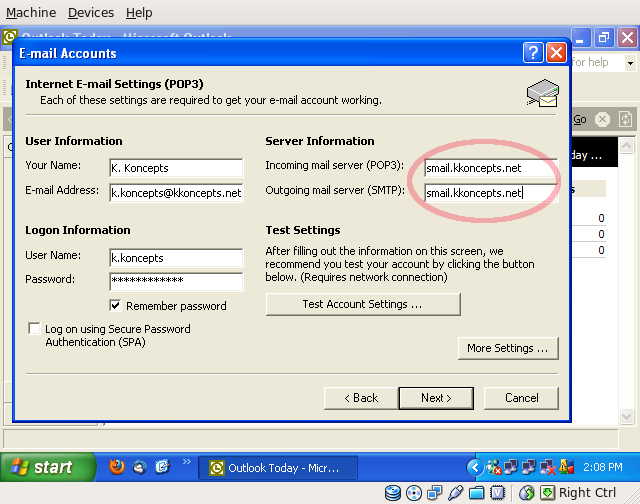
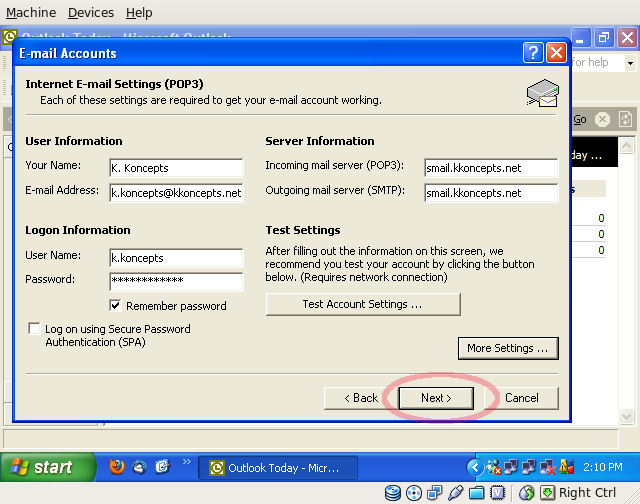
In the next window, enter your name and your email address in the two fields in the"User Information" section. This is what others will see as the "From" address when they receive emails from you.
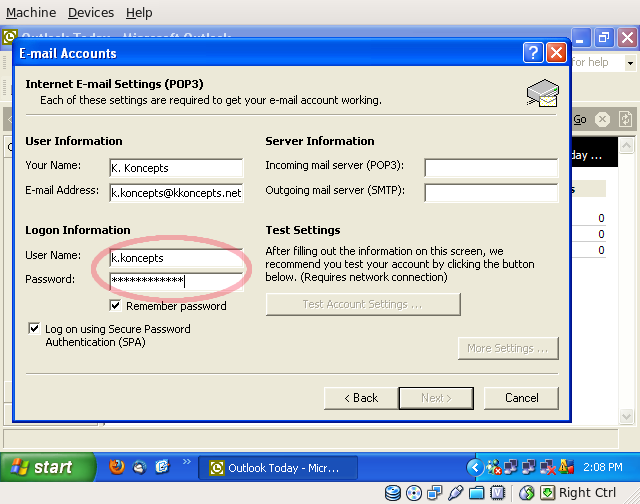
Then enter your email username and email password in the two fields in the "Logon Information" section. If your email address is "@kkoncepts.net", then your User Name is your email address without the "@kkoncepts.net". So in our example, where our email address is "k.koncepts@kkoncepts.net", then we enter simply "k.koncepts" as our user name.
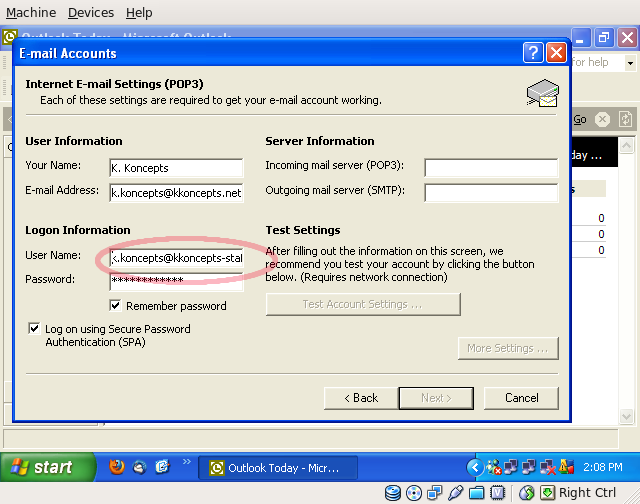
If your email address ends in anything other than "@kkoncepts.net", however, then enter your full email address as your user name. So if we were setting up an account for the address "k.koncepts@kkoncepts-staff.com", then we would enter that full email address as our user name.
Then enter "smail.kkoncepts.net" into both the "Incoming" and "Outgoing" server fields in the "Server Information" section.
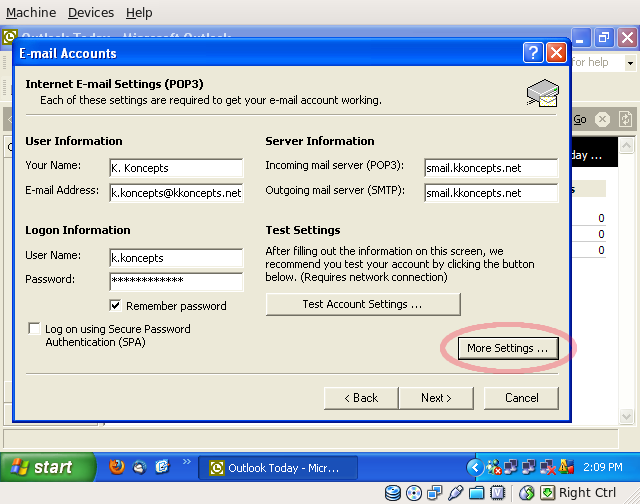
Now click the "More Settings ..." button.
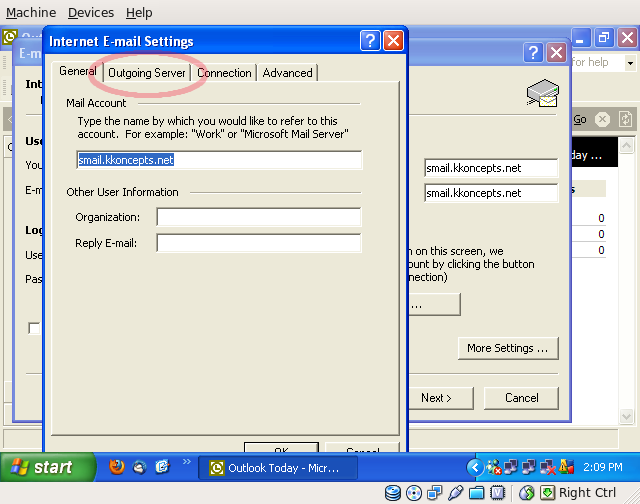
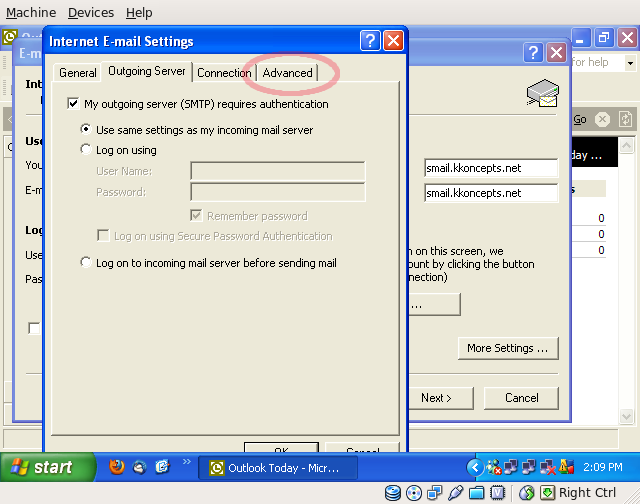
This will bring up the "Internet E-mail Settings" window. Click on the tab labeled "Outgoing Server".
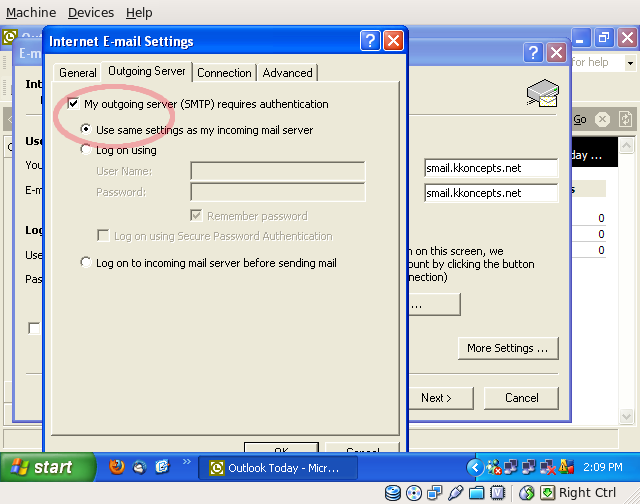
Check the box at the top which says "My outgoing server (SMTP) requires authentication." Make sure the option labeled "Use the same settings as my incoming mail server" is selected as well.
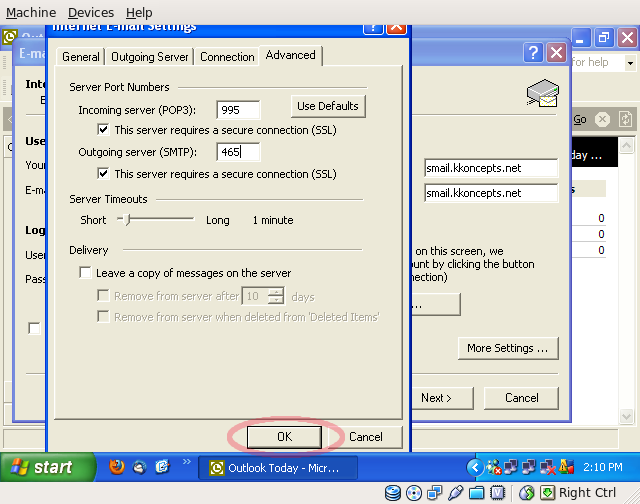
Then click on the "Advanced" tab.
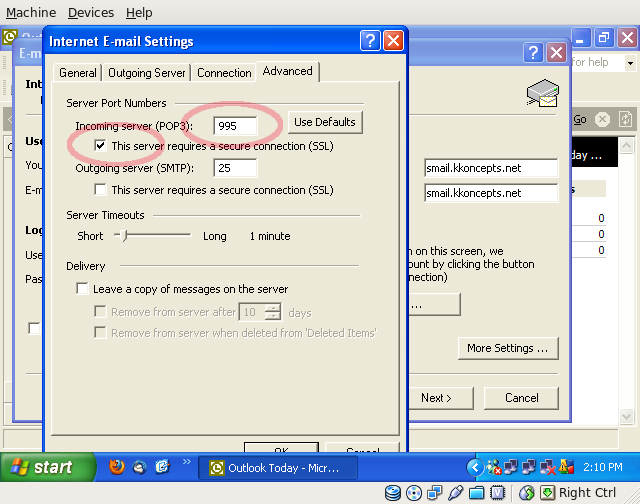
Near the top, under "Incoming Server" check the box which says "This server requires a secure connection (SSL)". If this is a POP3 account, then the port should change automatically to "995". If it doesn't change automatically, then manually change it to "995".
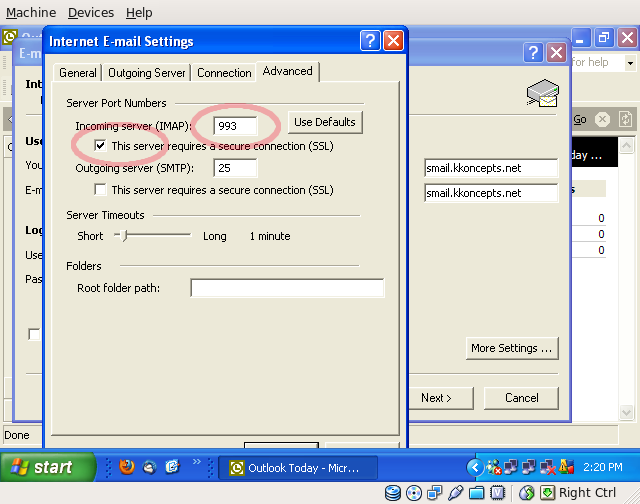
If this is an IMAP account, then when you check the box to require a secure connection, the port should change to "993". If it does not change automatically, manually change it to "993".
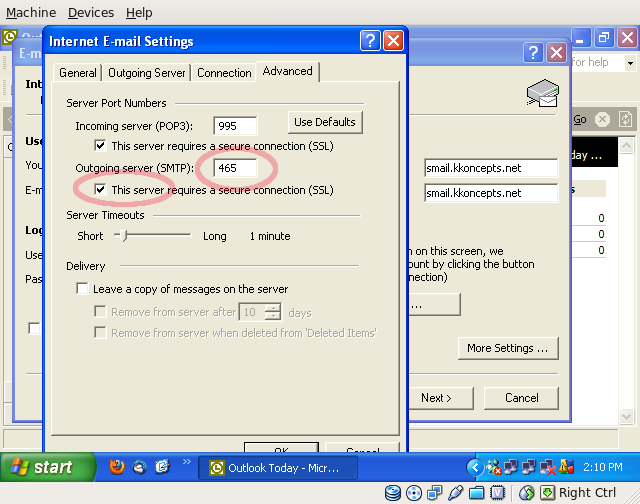
For either type of account, under "Outgoing Server" check the box which says "This server requires a secure connection (SSL)". Then manually change the port to be "465". (It will probably NOT change automatically, so make sure you change it manually or you will not be able to send mail.)
Finally click the "OK" button to close this window.
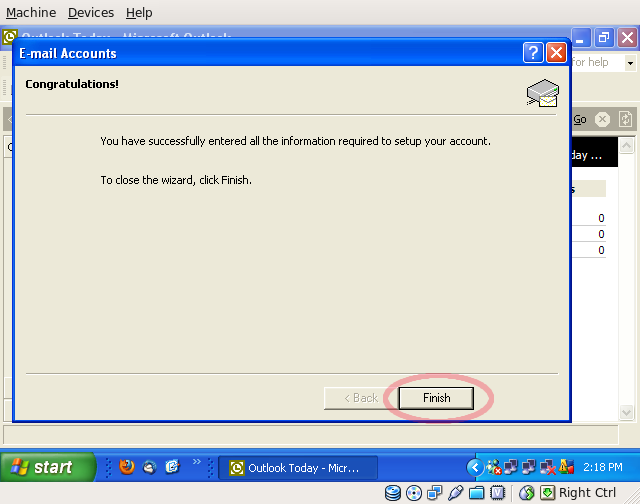
Now we're back to the original "E-mail Accounts" setup window. Click the "Next" button to continue. (Don't bother clicking the "Test Connection" button. Sending a test message will always fail because Outlook does not use the settings we just entered when checking the connection. But it will use them once the account is set up.)
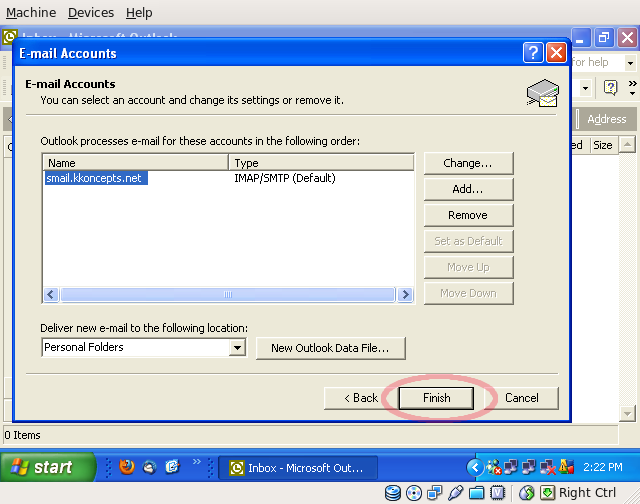
Finally click the "Finish" button and your KKoncepts email account is set up and ready to go.
If you have created a POP account, you're done. But if you created an IMAP account you may want to make the following change to your account.
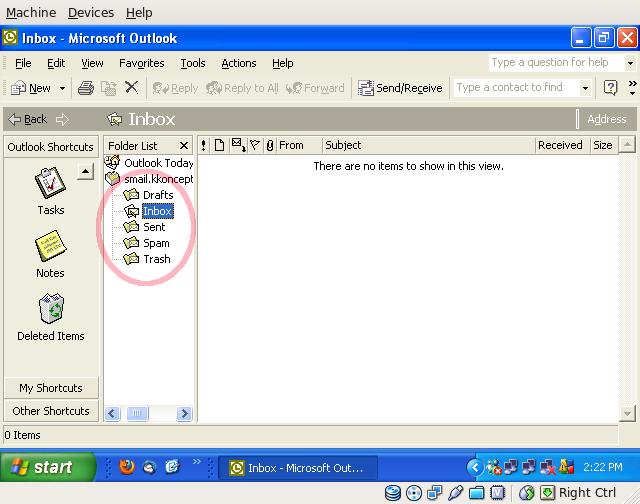
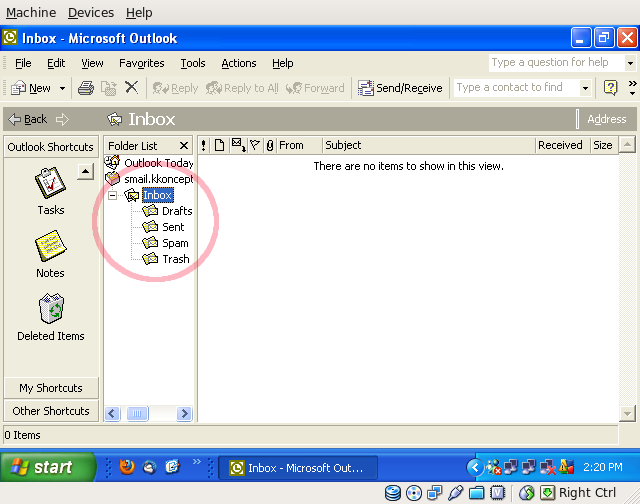
By default, all the folders in your account show up as children of your INBOX.
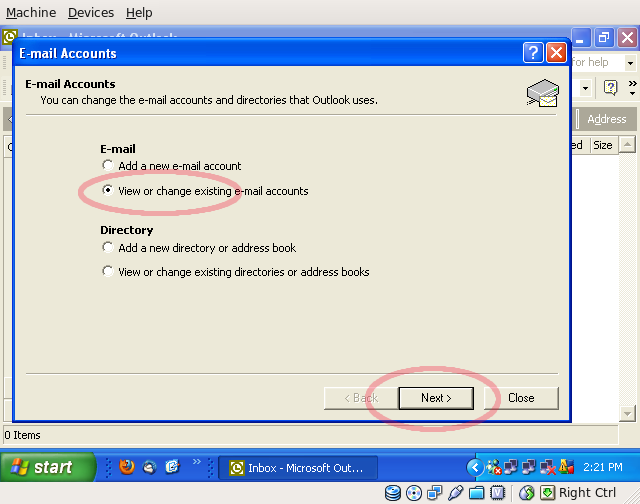
If you'd rather they were displayed all at the same level, then follow these instructions. First select the "Tools" menu and then the "E-mail Accounts..." item.
Then choose the "View or change existing e-mail accounts" item and click the "Next" button.
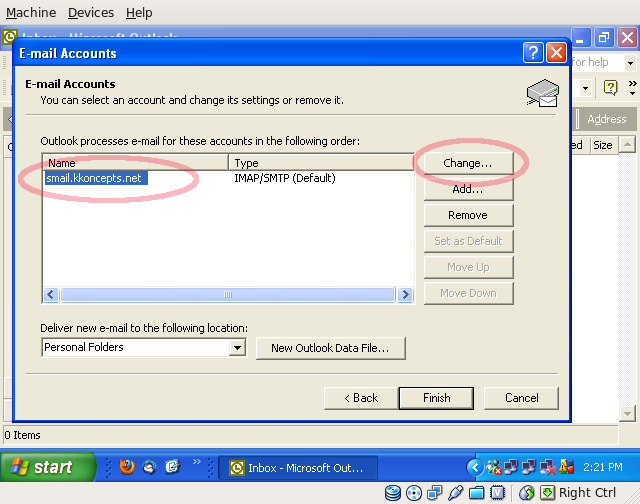
In the list of email accounts on the left, click on your KKoncepts account to highlight it and click the "Change" button.
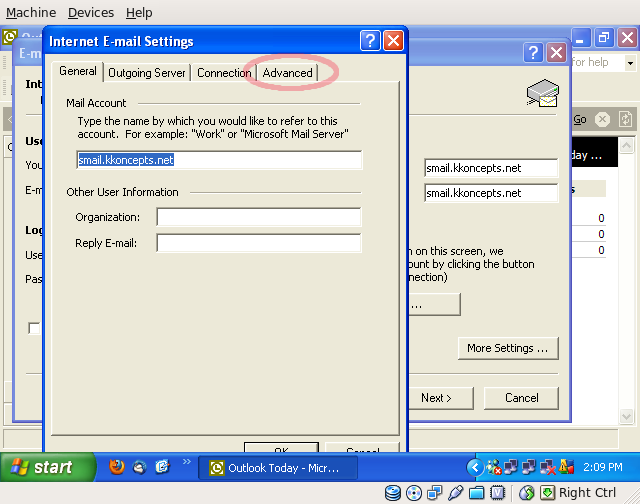
This brings up the "Internet E-mail Settings" box that we saw previously. Click on the "Advanced" tab.
Near the bottom, where it says "Root folder path:", enter "INBOX". Then click "OK" to close the Window.
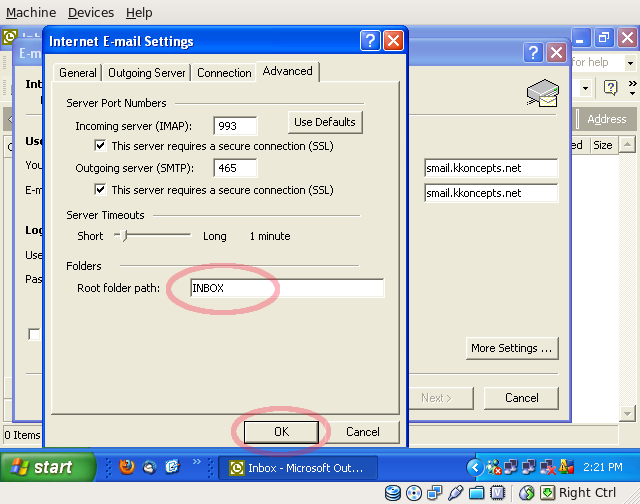
Outlook will warn you that the Root path has changed and that it has "flushed" the folder cache. Simply click "OK" to accept the message. Then click the "Finish" button to close the "E-mail Accounts" window as well.
Now you'll see that all your folders line up at that same level as the INBOX.