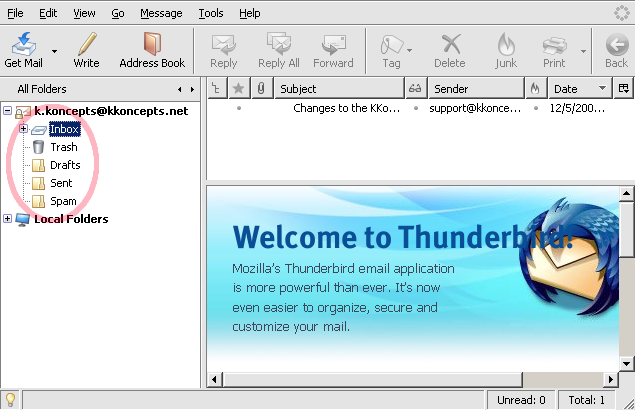
Here we will set up the Thunderbird email client (version 2) to send and receive our KKoncepts email account. (Click here if you need instructions for setting up Thunderbird version 3.) We'll use an imaginary user named "K. Koncepts" who has the email address. "k.koncepts@kkoncepts.net". Anywhere you see those names, you should, of course, use your own name and email address.
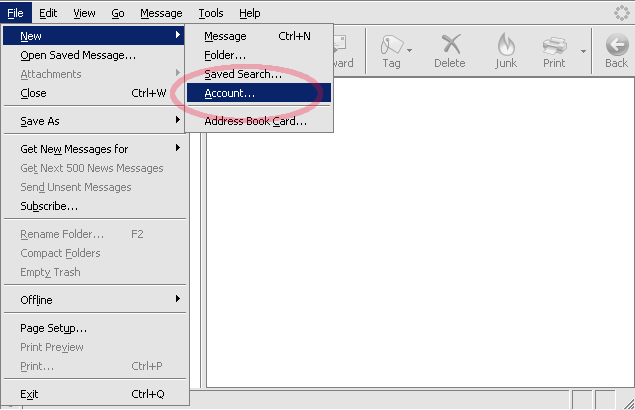
To set up your account, open Thunderbird and click on the "File" menu. Then select "New" and finally "Account".
Here's a screen shot of what that will look like. (Throughout this document, we'll highlight in light-red ovals where on the screen you should click or enter information.)
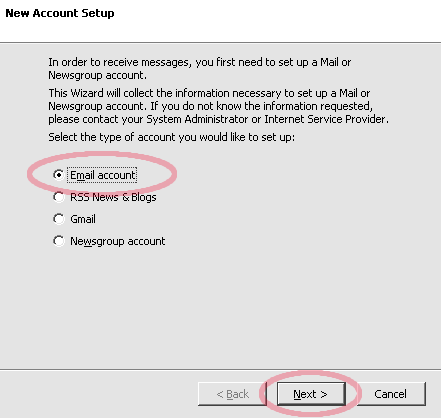
This will bring up the "New Account Setup" wizard. First select "Email Account" as the type of account you want to create and then click the "Next" button.
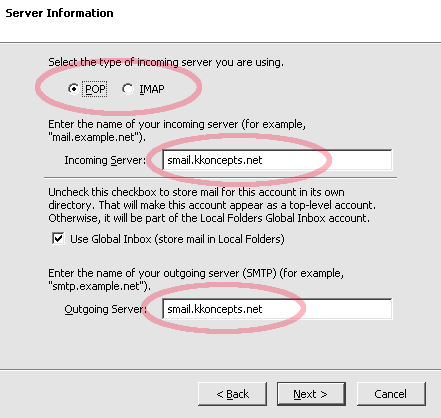
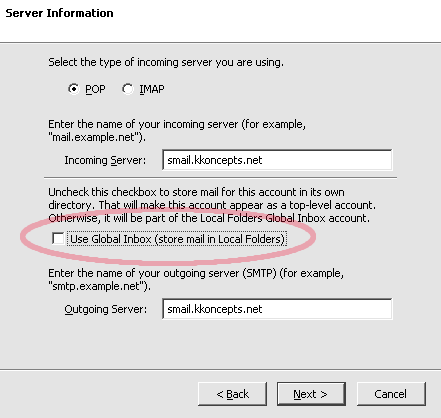
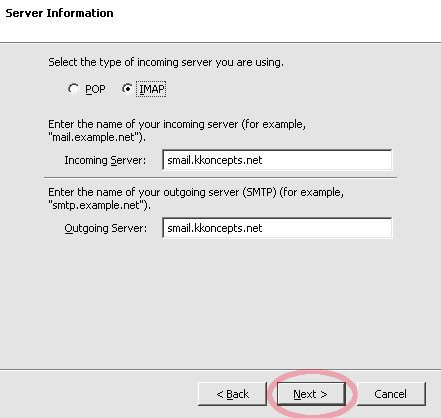
In the "Server Information" window, first select whether you want a POP or IMAP account. (If you are unsure, select POP.) Regardless of which type of account you choose, enter "smail.kkoncepts.net" into both the "Incoming" and "Outgoing Server" fields.
If you choose a POP account there's an item labeled "Use Global Inbox". But default it's checked. If your KKoncepts account is the only account you will check in Thunderbird, then you can leave this blox checked. But if you have other email accounts you check (or plan to check) in Thunderbird, then you should UN-check this box so that each account will have it's own INBOX.
Finally press the "Next" button to continue the wizard. (This screen show shows what the window will look like it you choose an IMAP account.)
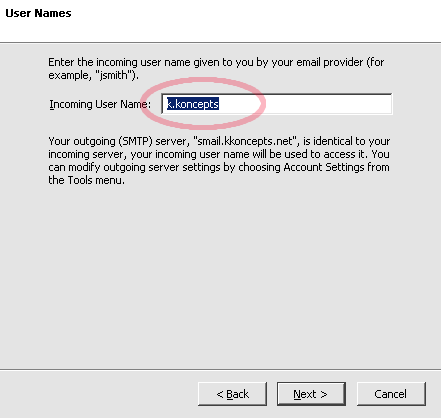
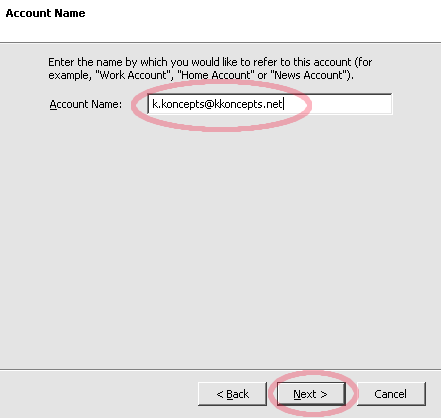
Now enter your User Login name in the "Incoming User Name" field in the next window. If your email address ends in "@kkoncepts.net", then your account name is your email address without "@kkoncepts.net". If your email address is anything else, then your account name is the same as your email.
In our case, our user's email address is "k.koncepts@kkoncepts.net", so it does end in "@kkoncepts.net". Therefore the account name is just "k.koncepts". So for this user, we'll enter "k.koncepts" as the "Account Name".
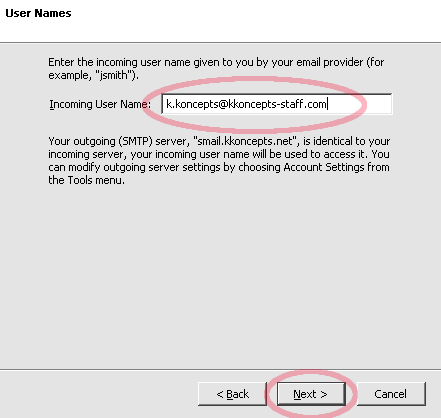
But if our email address was "k.koncepts@kkoncepts-staff.net", for example, then our account name would be our full email address - k.koncepts@kkoncepts-staff.net" as in the next screen shot. Once you've entered in your Account name, press the "Next" button.
Now enter in the name you want to use for this account, unless you have a reason, simply accept the default value of your email address. Then click the "Next" button.
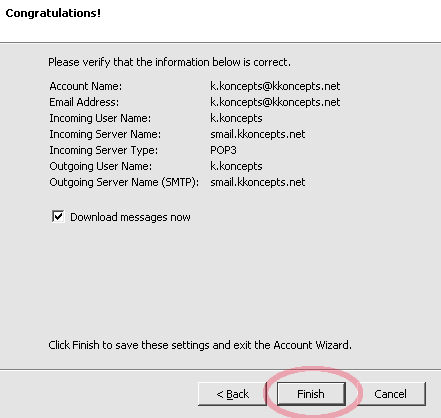
Finally click the "Finish" button to create your account.
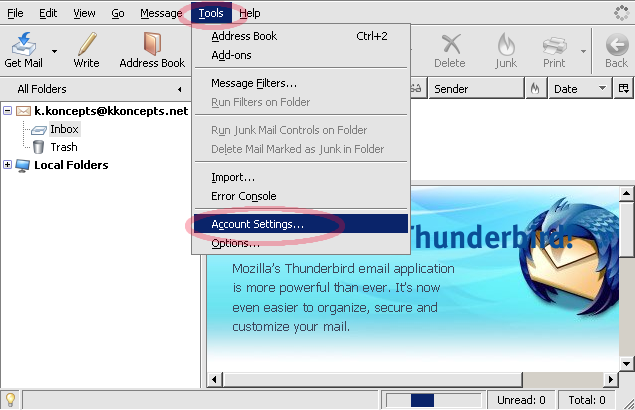
At this point Thunderbird will attempt to log you into your account and check your mail, but it won't be able to because we have not entered in the correct security information. Click on the "Tools" menu and choose the "Accounts" item to finish setting up your account. (If you are doing this on Linux, the "Accounts" menu item is in the "Edit" menu, rather than the "Tools" menu.)
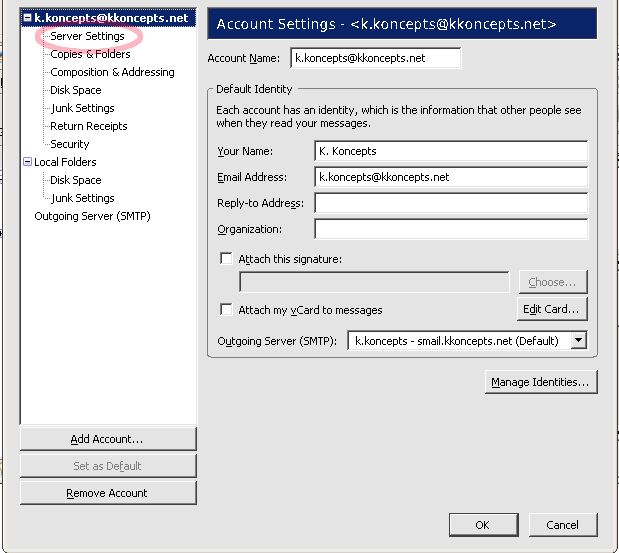
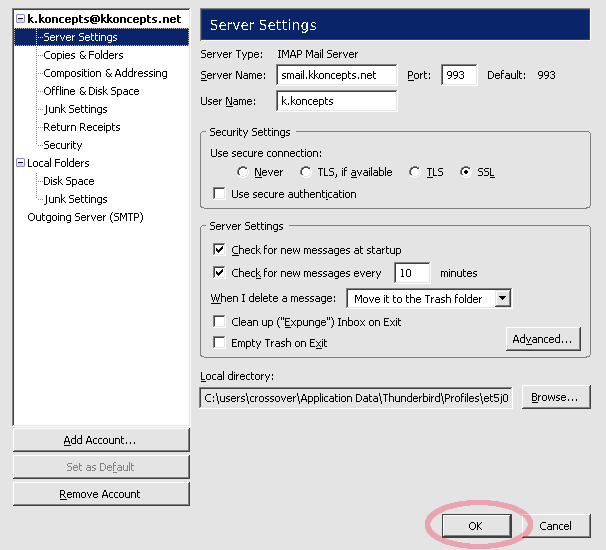
In the "Account Settings" box that appears, click on the "Server Settings" item in the left-hand pane.
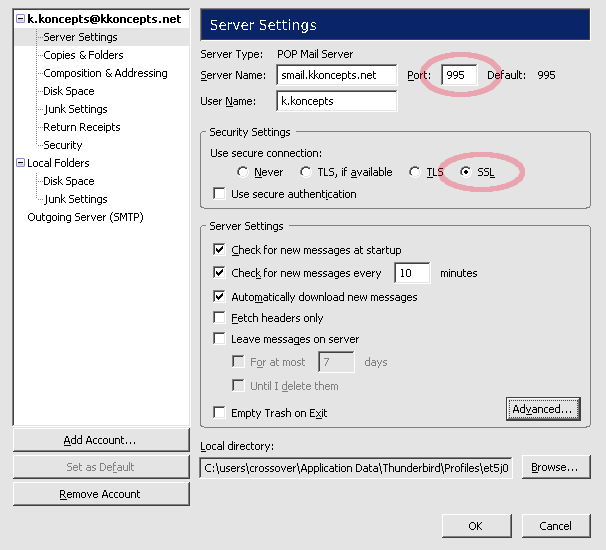
Then in the right-hand pane, in the "Security Settings" section, click on the "SSL" radio button. If you have created a POP account, then "Port" field should change to "995" as in the following screen shot. If it doesn't change automatically, change it manually.
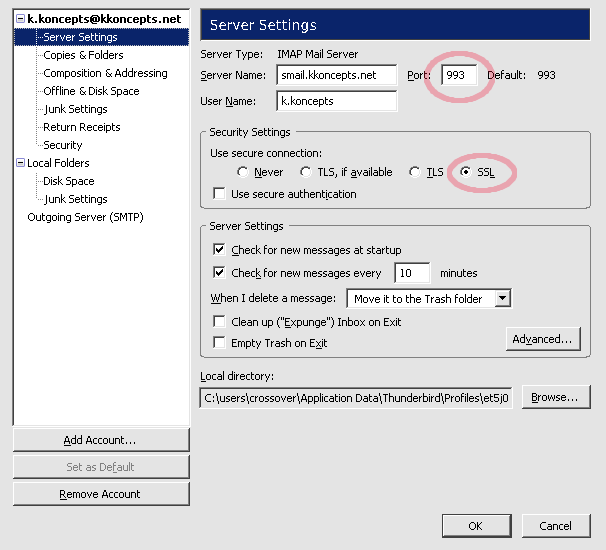
If you have created an IMAP account, then the port should automatically change to "993". Again, if it does not change automatically, manually change it to "993".
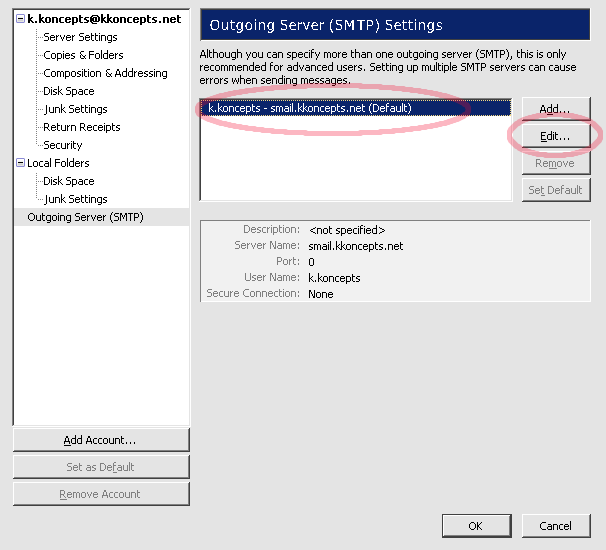
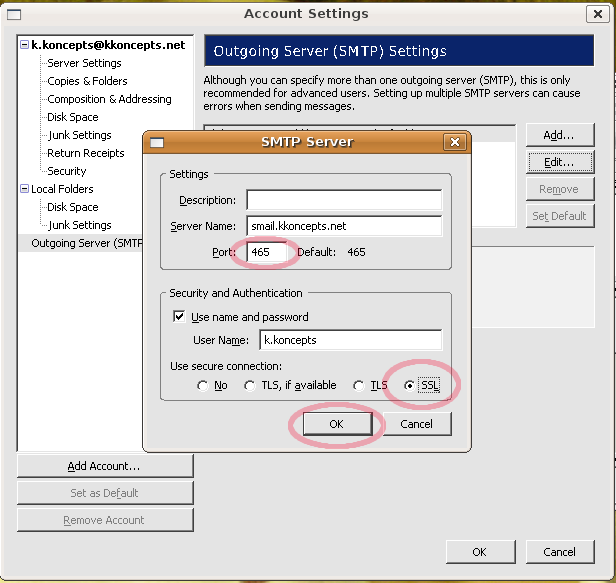
Now at the bottom of the left-hand pane, click on the "Outgoing Server (SMTP)" line to select it.
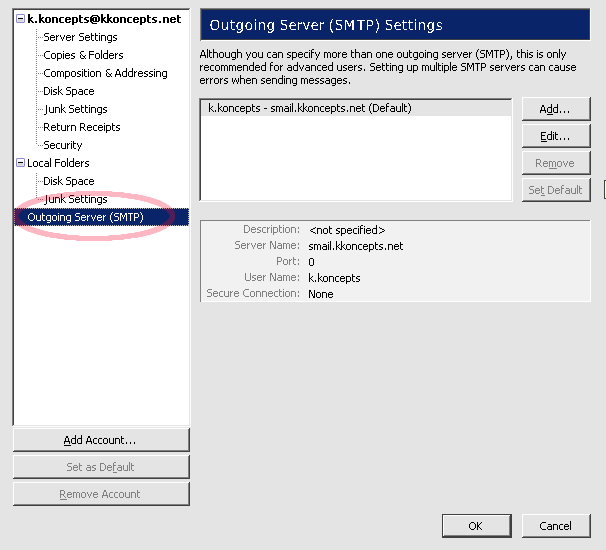
Then on the right-hand side, click on the "smail.kkoncepts.net" line and click the "Edit" button.
Near the bottom of the "SMTP Server" window that appears, click on the "SSL" radio button. The port at the top of the window should change automatically to "465". If it doesn't change automatically, then manually change it to "465". Click "OK" after you have made these changes.
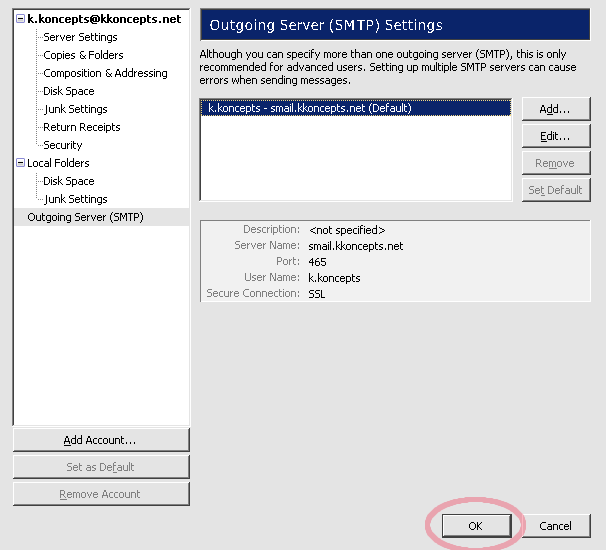
Finally click "OK" again to close the "Account Settings" window and return to the main Thunderbird window where you can send and receive your mail.
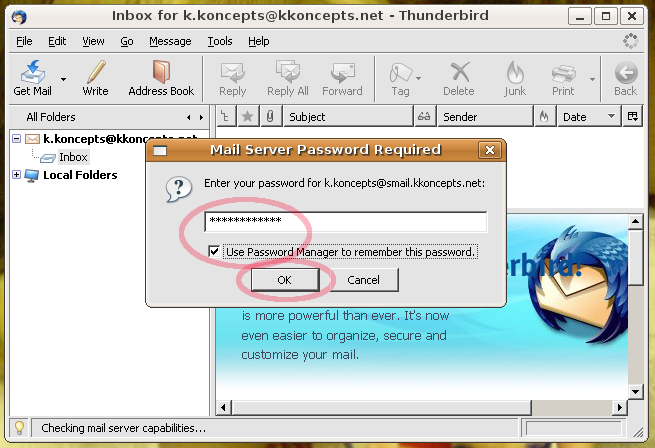
The first time you download your email and the first time you send an email, Thunderbird will ask you for the password for this account.
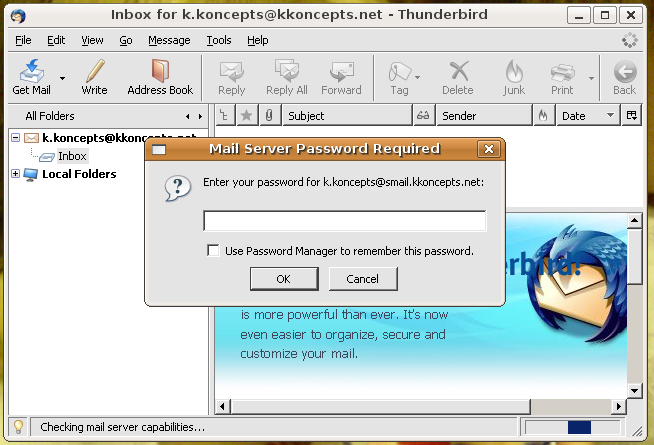
Enter in your KKoncepts email password. If you don't want Thunderbird to ask you for your password each time you send or receive mail, then check the box which says "Use Password Manager to remember this password." Click "OK" once you have entered this information.
 have THunderbird
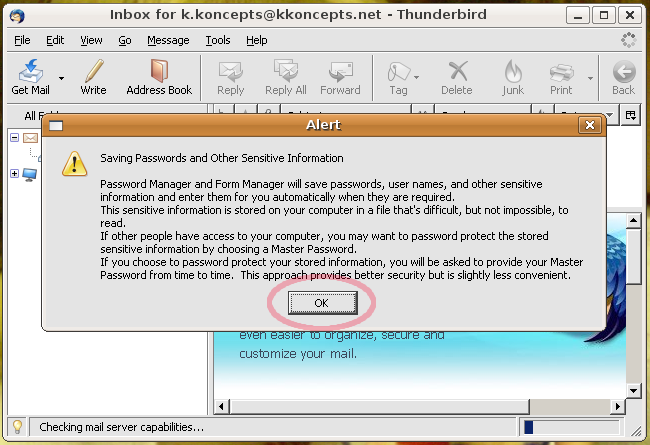
If you checked the box to have Thunderbird save your password, you'll see a security alert explaining that saving your password means that anyone who gets access to your computer, can now access your email. Click "OK" to close the alert.
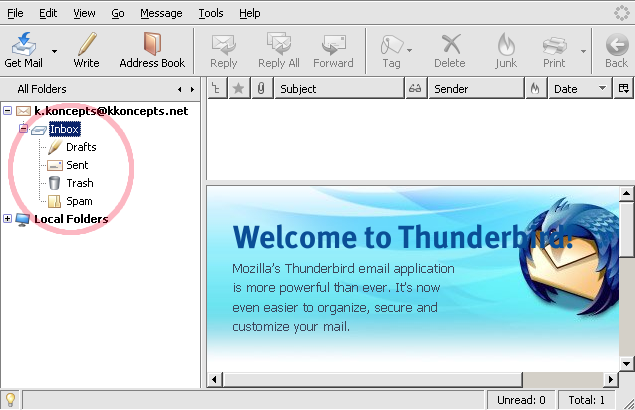
Now your KKoncepts email account is set up and ready to go.
If you have set up an IMAP account, however, you may be interested in reading the following steps. They are not necessary for your account to work properly; they merely change its appearance.
By default in an IMAP account, all you folders will appear as "children" of your "INBOX", as in the following screen shot.
If you prefer that all your folders be on the same level as the INBOX, then follow these steps.
First click on the "Tools" menu and select "Account Settings" just as we did before to bring up the "Accounts Settings" window. (On Linux this is "Edit->Account Settings" rather than "Tools->Account Settings".)
Then click again on the "Server Settings" item in the left-hand pane for your account.
Now on the right-hand side, click on the "Advanced" button.

In the window that appears, type "INBOX" at the top where it says "IMAP server directory". Then click "OK" to close this window.
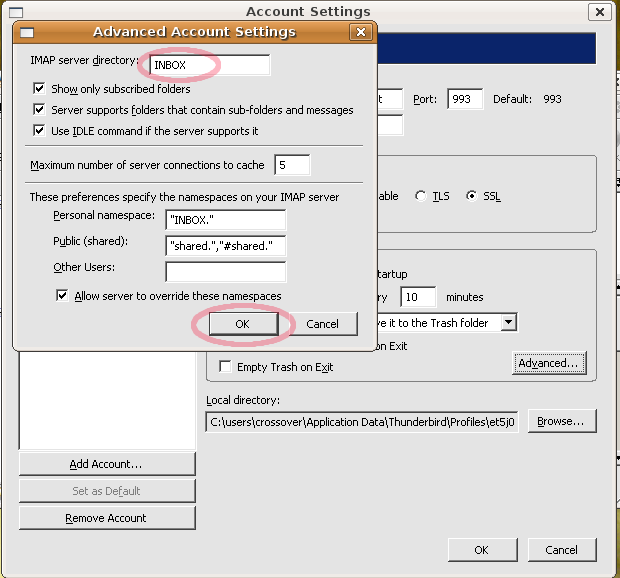
Finally, click "OK" again to close the "Accounts Settings" window.
Restart Thunderbird and you'll see all your folders lined up at the same level as the INBOX.